Release Pipelines
Release Pipelines is currently in a closed beta, please contact support@flagsmith.com if you'd like to gain access.
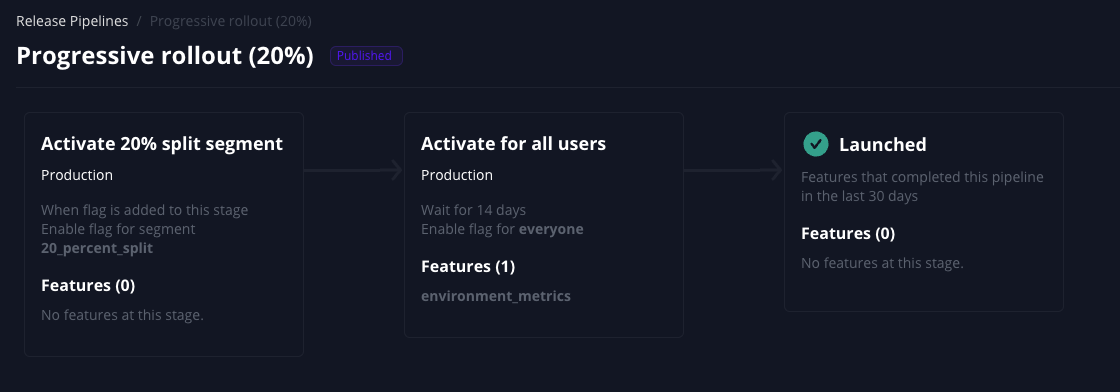
Release Pipelines act as your intelligent release assistant, automating your entire feature flag deployment process. Define stages that your flags progress through automatically, with triggers and actions that control rollouts to selected environments and audiences. Release Pipelines can automatically generate change requests when promoting flags to production, eliminating manual effort and streamlining your deployment workflow.
Key Benefits
- Automated Deployments: Reduce manual intervention by automating flag releases across environments.
- Standardised Process: Ensure consistent release protocols across your team.
- Reduced Risk: Control the pace of rollouts with customisable conditions.
- Better Visibility: Track the progress of your feature releases through each stage.
Creating a Release Pipeline
Step 1: Navigate to Release Pipelines
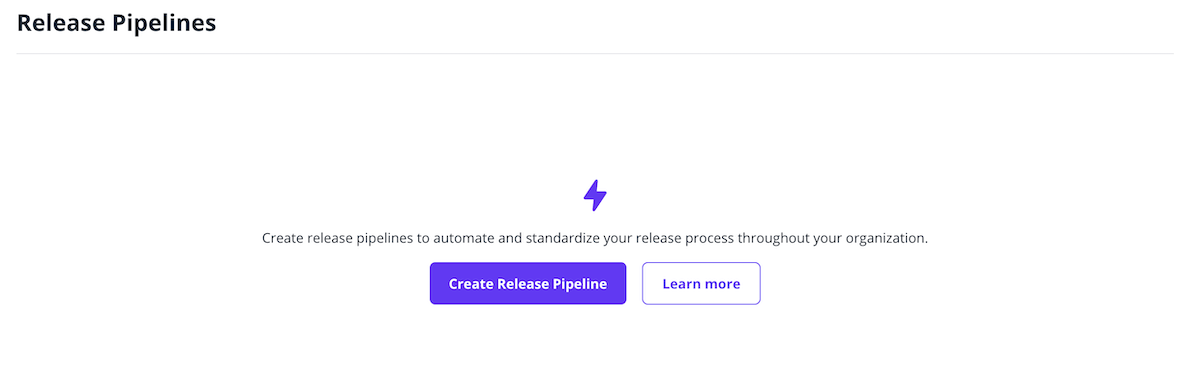
- Go to your project in the Flagsmith dashboard.
- Navigate to the Release Pipelines section.
- Click Create Release Pipeline.
Step 2: Configure Pipeline Settings
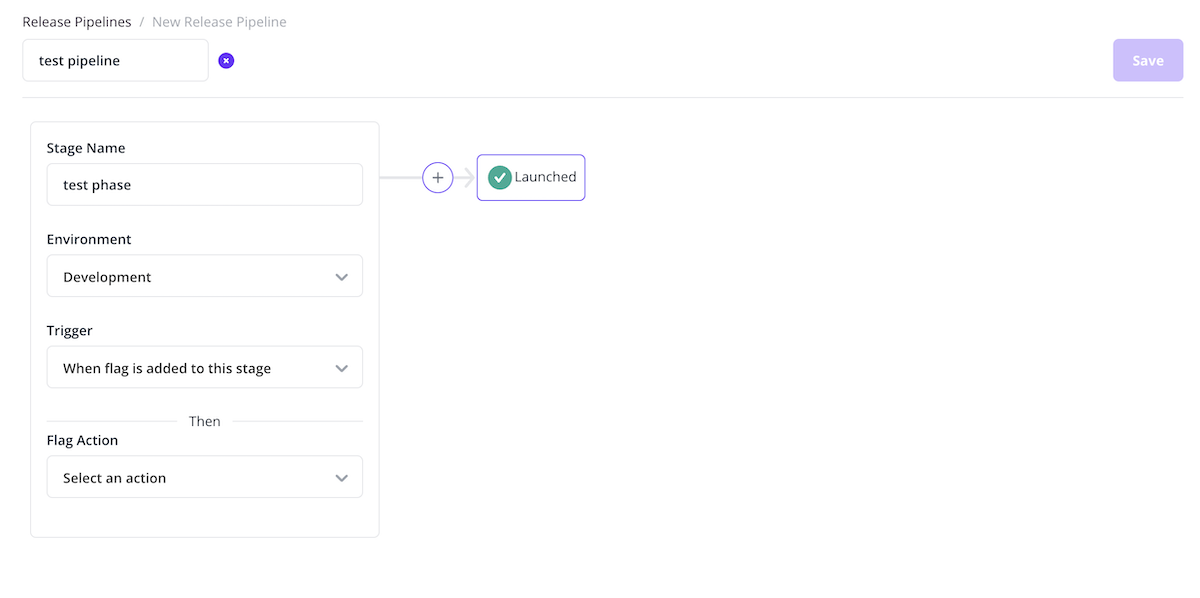
Pipeline Information:
- Name: Give your pipeline a descriptive name (e.g., "Web App Release Pipeline").
Pipeline Configuration:
- Add multiple stages to represent your release process.
- Each stage can represent an environment or phase in your release process.
Pipeline Stages
Stage Configuration
Each stage in your pipeline consists of:
- Stage Name: A descriptive name for the stage (e.g., "Development", "Staging", "Production", "Turn on beta users").
- Trigger: When the stage should be activated.
- Actions: What should happen when the stage is triggered.
Stage Triggers
On Enter (ON_ENTER)
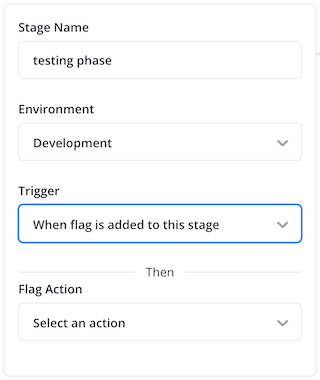
- Triggers immediately when a flag is added to this stage.
- Use this for immediate actions when flags reach a particular stage.
Wait For (WAIT_FOR)
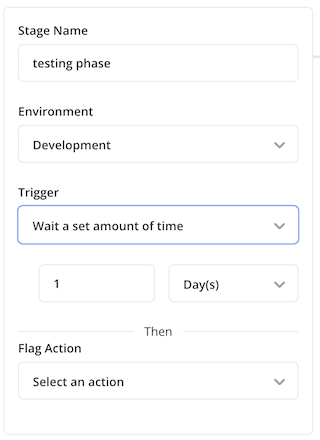
- Triggers after waiting for a specified amount of time.
- Configure the wait time in minutes, hours, or days.
- Use this for gradual rollouts or testing periods.
- Optionally, add an abort condition to stop the release if the flag is tagged during the wait.
Stage Actions
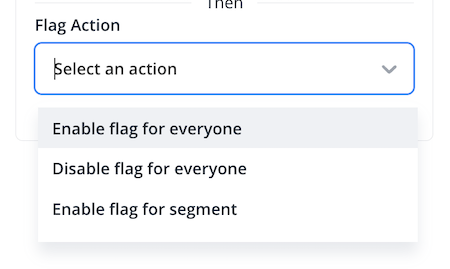
Toggle Feature Actions:
- Enable flag for everyone: Enables the feature flag for all users in the environment.
- Disable flag for everyone: Disables the feature flag for all users in the environment.
- Enable flag for segment: Enables the feature flag for a specific user segment.
- Disable flag for segment: Disables the feature flag for a specific user segment.
Publishing a Release Pipeline
Draft Status
After a release pipeline is created and before it is published, it remains in draft mode. In this state:
- The release pipeline is inactive and does not process feature flags.
- The configuration remains editable.
- You can modify stages, triggers, and actions freely.
- Once published, the pipeline becomes immutable and operational.
Publishing Process
Once published, a release pipeline cannot be modified. Ensure your configuration is correct before publishing.
- Complete your pipeline configuration.
- Review all stages, triggers, and actions.
- Click Publish Pipeline.
- Confirm the action when prompted.

Adding Flags to Release Pipelines
In alpha phase there are no automatic rollbacks, you'd need to revert changes manually. To stop a release automatically, use an abort condition.
From the Dashboard
- Navigate to your feature flags.
- Select the flag you want to add to a pipeline.
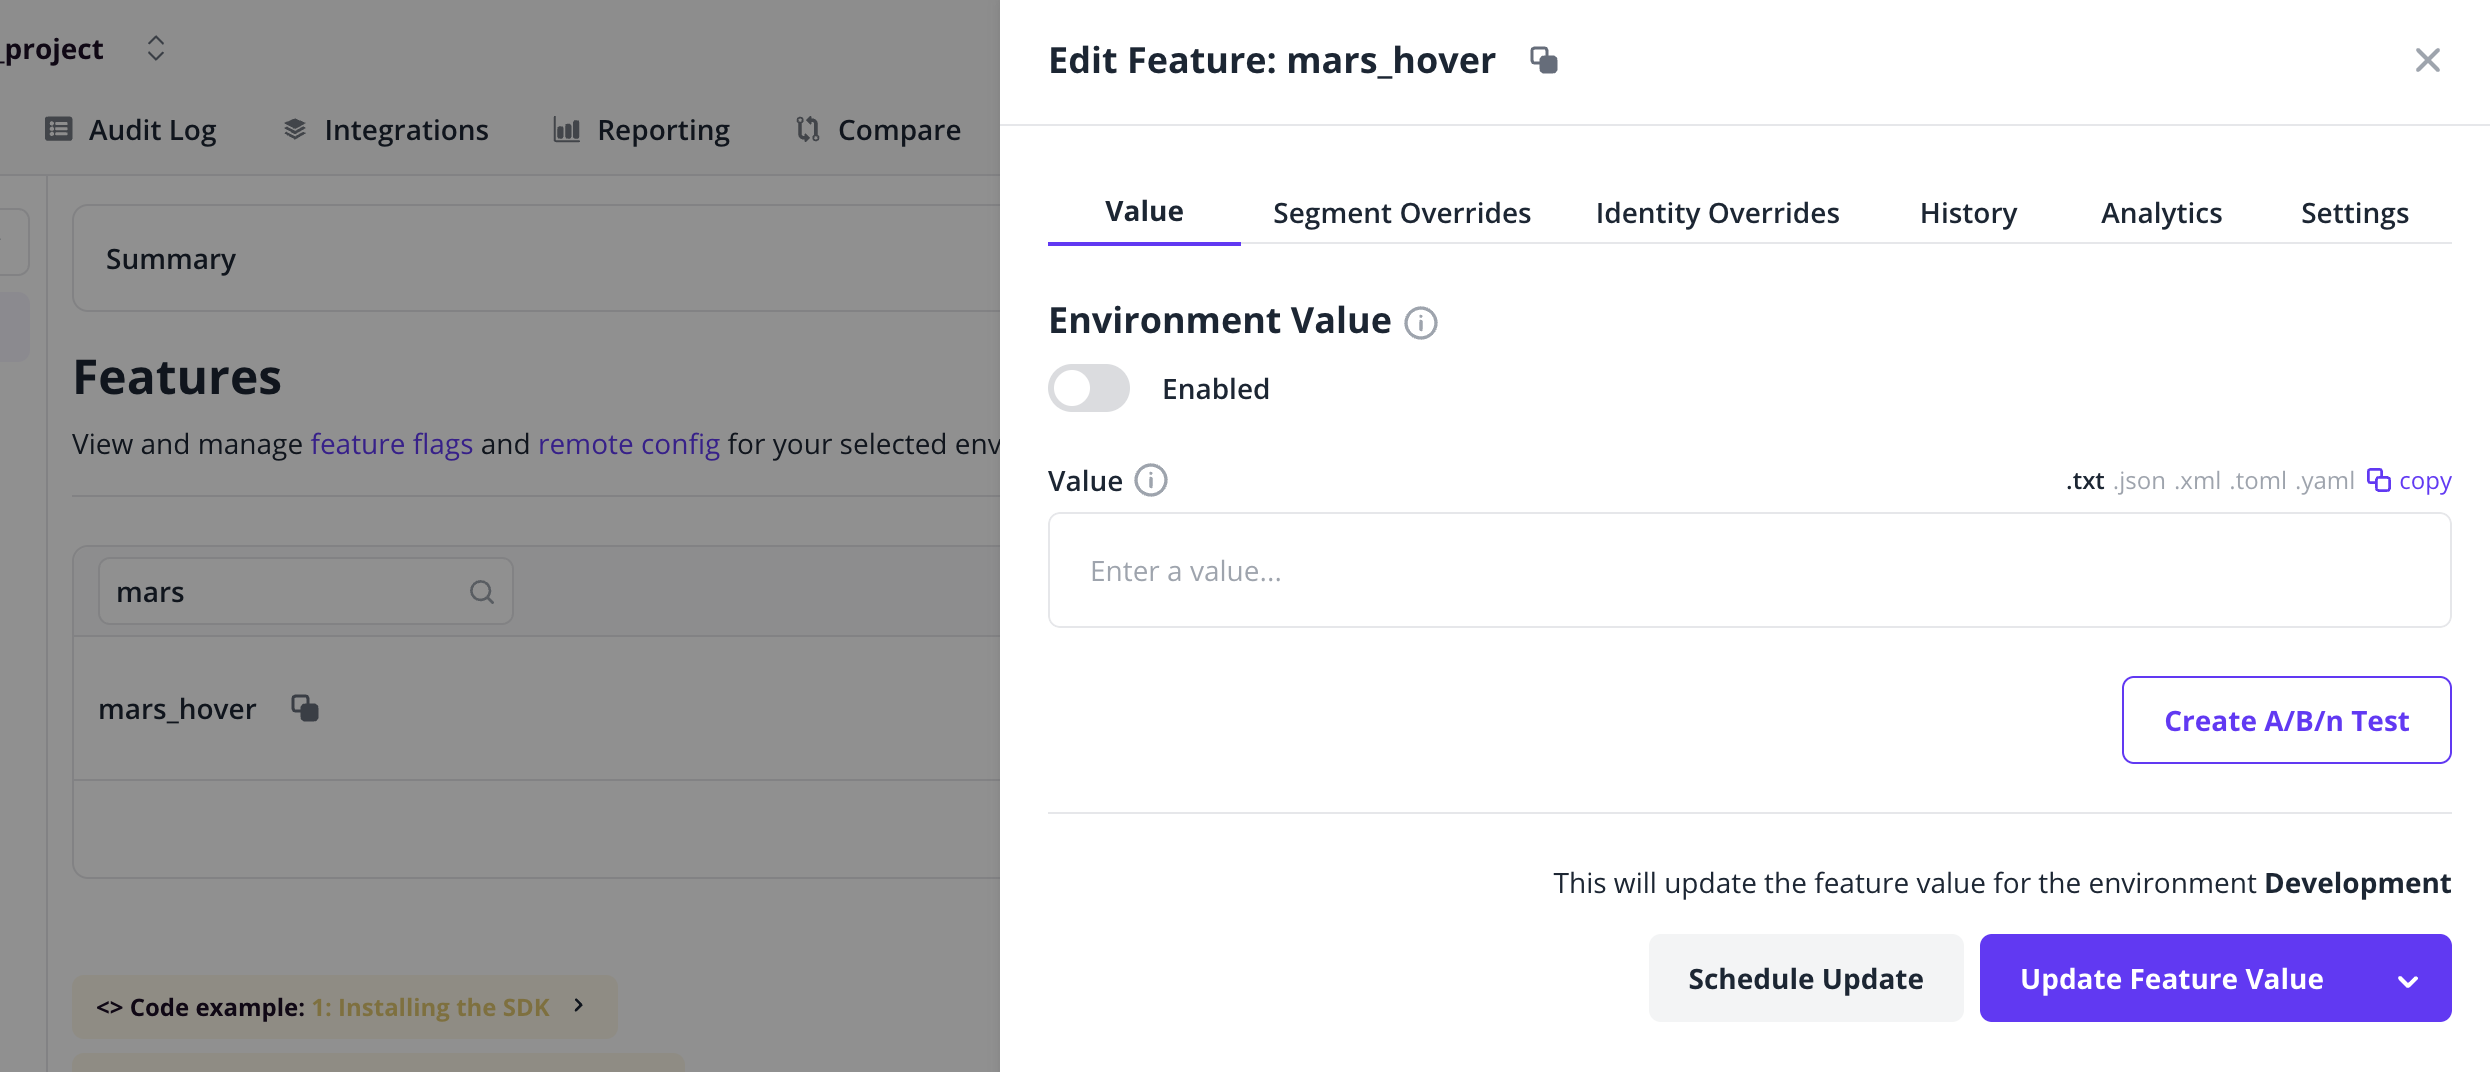
- Click the arrow on the "Update Feature Value" button to expand options.
- Click the Add to Release Pipeline option.
- Select the pipeline.
- Confirm the selection.
Pipeline Execution
Once a flag is added to a pipeline:
- It starts at the first stage you specified.
- The pipeline automatically executes based on your configured triggers.
- Actions are performed according to your stage configuration.
- The flag progresses through each stage in sequence.
Managing Release Pipelines
Viewing Pipeline Status
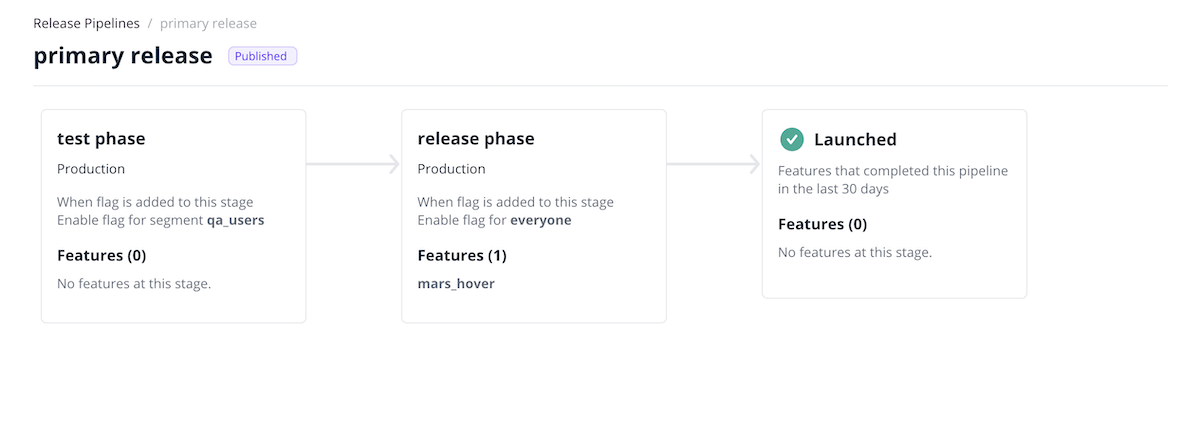
- Active Pipelines: View all published pipelines and their current status.
- Flag Progress: Track which flags are currently in each stage.
Aborting a Pipeline When a Flag Is Tagged
A Wait For stage can act as a kill switch. Choose a tag under Abort if tagged with. If the flag gets that tag while it waits in the stage, the pipeline stops and the flag is turned off in the stage's environment. If the wait runs out and the flag doesn't have the tag, the stage runs its actions and the flag moves to the next stage as usual.
Any tag in the project can be used, including system tags. The most common choice is the Unhealthy tag, which Feature Health adds when your observability provider sends an alert for the flag. You can also use your own tags and apply them from your own tooling through the Admin API.
Example: release to everyone unless an alert fires
- Production (beta): On Enter, enable the flag for the
betasegment. - Production (everyone): Wait For 1 hour, abort if tagged with Unhealthy, then enable the flag for everyone.
The pipeline aborts if the flag:
- is tagged with the chosen tag while it waits in the stage, whoever adds the tag (a team member, the Admin API, Feature Health or an integration); or
- already has the chosen tag when it enters the stage.
When the pipeline aborts:
- The flag is disabled for everyone in the stage's environment. This covers the environment default and every segment override, including overrides set by earlier stages. Flag values are not changed.
- The change is published as a new version of the flag, so it appears in the flag's version history.
- The flag is removed from the pipeline. You can add it to a pipeline again once you've fixed the issue.
- Other environments are not changed.
- An entry is added to the audit log, and the stage notification email says the pipeline was aborted and why.
- Removing the tag after the pipeline has aborted does not resume it. An abort can't be undone.
- The Unhealthy tag applies to the flag across the whole project. An alert from any environment, such as staging, will abort a production stage that uses it.
- Abort conditions are only available on Wait For stages. They don't apply to stages that have already finished, or to phased rollouts.
- Identity overrides are not changed when a pipeline aborts.
- If the chosen tag is deleted, the stage can no longer abort. Flags waiting in it will move on when the wait runs out.
Removing Flags from Pipelines
If you need to remove a flag from a pipeline:
- Navigate to the flag or pipeline view.
- Select Remove from Release Pipeline.
- Confirm the action.
Audit Log Events
Release Pipelines generate audit log events to track pipeline-related activities.
Events
Pipeline Creation
- Event:
RELEASE_PIPELINE_CREATED_MESSAGE. - Triggered when a new release pipeline is created.
Pipeline Publication
- Event:
RELEASE_PIPELINE_PUBLISHED_MESSAGE. - Triggered when a pipeline is published and becomes active.
Pipeline Deletion
- Event:
RELEASE_PIPELINE_DELETED_MESSAGE. - Triggered when a pipeline is permanently deleted.
Feature Addition to Pipeline
- Event:
RELEASE_PIPELINE_FEATURE_ADDED_MESSAGE. - Triggered when a feature flag is added to a release pipeline.
Feature State Updates
- Event:
FEATURE_STATE_UPDATED_BY_RELEASE_PIPELINE_MESSAGE. - Triggered when a pipeline automatically updates a feature flag's state during stage execution.
Pipeline Aborted
- Event:
RELEASE_PIPELINE_ABORTED_MESSAGE. - Triggered when a flag is tagged with a stage's abort tag and the pipeline turns the flag off.
Viewing Audit Logs
You can view these audit events in your project's audit log:
- Navigate to your project.
- Go to the Audit Log tab.